Install Ubuntu on Surface Pro 3?

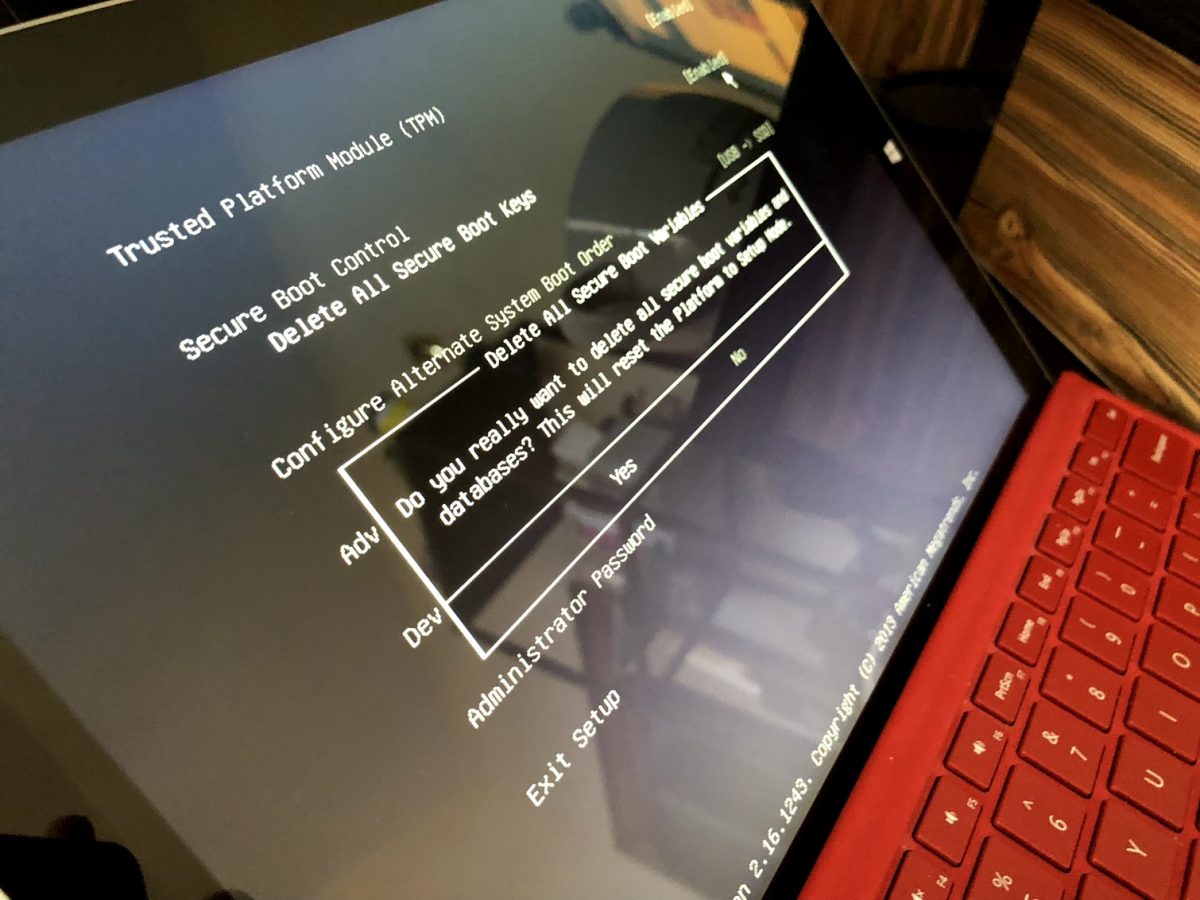
Prepare to spend  hours and, if you get it done, you’ll end up with an unofficial kernel to get all of Surface Pro’s hardware working. The issue is the UEFI boot system. You’ll need to disable Secure Boot, install Ubuntu and then prepare to work on boot issues for a few hours. Install, reinstall, and, if you finally get it running, you’ll need a second system and a spare USB to install updates as Wifi, Bluetooth, Typecover, Camera and just about every bit of hardware that makes a Surface Pro 3 a Surface product will not be functioning.

Unfortunately, it isn’t worth it. Save all the grief and install Fedora Workstation. You’ll still need to disable Secure Boot but, after that is out of the way, you’ll have zero issues and just about everything will work straight away.

If you’re in the market for a Linux system and are eyeing the Surface line with the idea of swapping the OS, don’t do it. If it is a new Surface you’ll void your warranty by replacing the OS and mucking around with Secure Boot. You can find cheaper hardware that will run Linux without any issues elsewhere. If you want high end, head on over to Dell and checkout their desktops and laptops created specifically for developers. They’ll ship with Ubuntu.

Happy Linuxing!

Borderlist – I made a thing

So listen, I made a thing. Yes, it is another to do app thingie but this one is built a bit differently. I work from so many lists on any given day that it is difficult to see everything at a glance.

I want to

  • See multiple lists at a time around the same topic.
  • Make a list, add some items, get stuff done, tick’em off.
  • Delete lists and clear my boards.
  • See it all on my phone without having to download yet another app.

No bells and whistles. No fluff.
I want a disposable Post-It Note system without all the sticky pads.

With these goals in mind I built Borderlist. It’s free, simple, and I use it every day.

Visit Borderlist

Because this is a tech blog, here are some nerdy details. The front end is built with Bulma (CSS) and, once in an account, it is all Vue using a Laravel based API to handle the data.

If you decide to give it a try, let me know what you think.

Fixing “Syntax error or access violation: 1071 Specified key was too long;” Courtesy of Laravel News

I found this fix on Laravel News, if you haven’t been there… leave this site and go there now, and just wanted to record it in a way that was easy for me to access. I’ve Googled this thing 3 times this week.

<?php use Illuminate\Support\Facades\Schema; public function boot() { Schema::defaultStringLength(191); }
AppServiceProvider.php

Setting Up, Creating and Updating a hasOne Relationship in Laravel

Not a lot on creating and updating a hasOne record so here’s what ended up working for me. I have my Site model and a SiteCache. SiteCache should have a single record per Site.

SiteCache migration (the Site migration isn’t that important so I omitted it here)

<?php use Illuminate\Support\Facades\Schema; use Illuminate\Database\Schema\Blueprint; use Illuminate\Database\Migrations\Migration; class CreateSiteCachesTable extends Migration { /** * Run the migrations. * * @return void */ public function up() { Schema::create('site_caches', function (Blueprint $table) { $table->longText('json_content'); $table->unsignedInteger('site_id'); $table->foreign('site_id')->references('id')->on('sites')->onDelete('cascade'); $table->timestamps(); }); } /** * Reverse the migrations. * * @return void */ public function down() { Schema::dropIfExists('site_caches'); } }
create_site_caches_table.php

Site Model

<?php namespace App; class Site extends Base // base is a model that I extend, nothing of note in it { public function cache() { return $this->hasOne(SiteCache::class); } public function setCacheContent($content) { $data = ['json_content' => $content]; if($cache = $this->cache()->first()) { $cache->update($data); } else { $this->cache()->save( new SiteCache($data) ); } return $this; } }
Site.php

SiteCache Model

<?php namespace App; class SiteCache extends Base { public function site() { return $this->belongsTo(Site::class); } }
SiteCache.php

In use

<?php $site = Site::first(); $site->setCacheContent($json);
inUse.php

The creating and updating of the cache record on the SiteCache page isn’t as fluent as I’d like but with a little helper method on the Site model all is good.

How to use Client Credentials Grant Tokens for your API authorization with Laravel 5.4’s Passport

In trying to build a very small micro-service I decided to use client credential grant tokens. I didn’t need users or personal tokens. I just needed one of my other sites to be able to access data for this new micro-service.

According to Taylor, “The client credentials grant is suitable for machine-to-machine authentication” which sounds just great. So I set off to build the entire service using TDD with Passport::actingAs() to mimic authorization knowing I’d do a final external test once it all was working.

All is working great and my tests are passing with my testing database. So, I run migrations on my real database, create my passport client with “php artisan passport:client,” give it a user id of 1, “ApiAccess” for the name for funsies, and keep the default for the redirect. This gives me a Client ID and Client secret.

I head over to Postman, pop those in, send a post and get my access token.
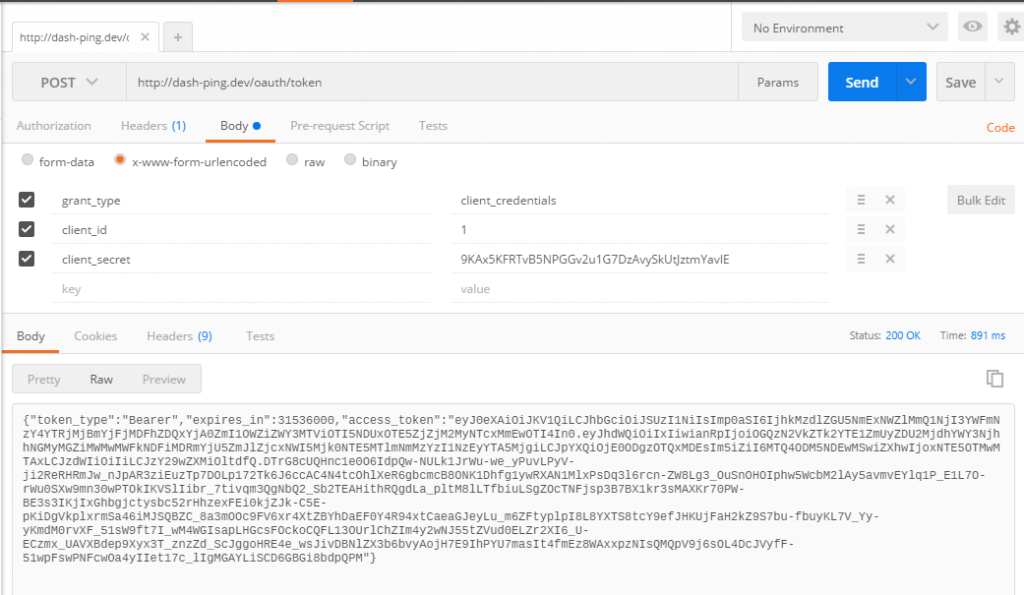
So far, so good. Now, I grab the access token, throw it in my headers, and fire off a post to my api waiting to be stunned by my own greatness…
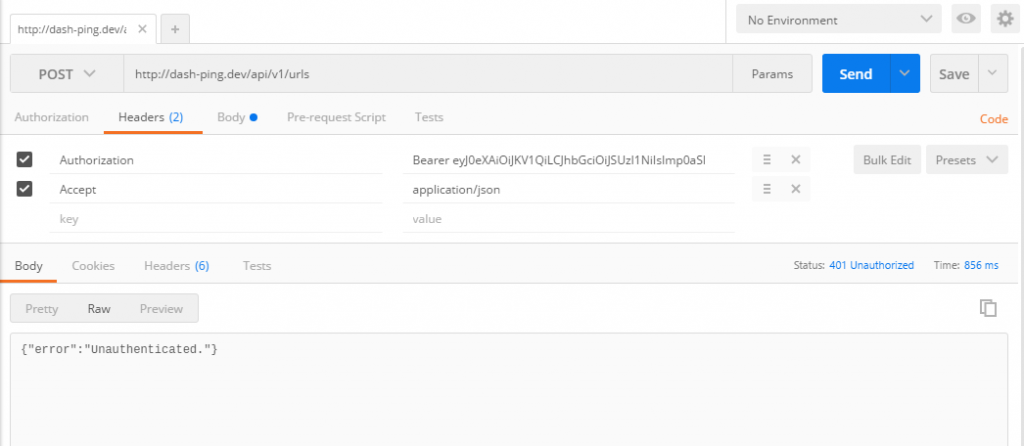
{"error":"Unauthenticated."}

Well shit.

After a 2ish hours, I figured out how to implement it without making a mess. These instructions assume you know what Client Credential Grant Tokens are for (read the above link about “machine-to-machine”) and why you might use them. Also it doesn’t address a funky token expiration issue that some found in postman. This, it turned out, didn’t affect me but did lead me on a wild goose chase for a bit.

To start with, move all your API routes that you want to use client credential authorization on out of:

/routes/api.php

and move them into a new route file titled:

/routes/client_credentials.php

This will allow us to separate these routes so we don’t affect any other necessary API routing in the future.

Next, we need to begin using this new routes file. To do this, I updated:

/app/Providers/RouteServiceProvider.php

by adding a new method and calling it in the existing “map” method. I’ve abbreviated the file to show only the necessary updates:

<?php class RouteServiceProvider extends ServiceProvider { // existing map method public function map() { $this->mapApiRoutes(); $this->mapWebRoutes(); // ref new method for adding client credentials $this->mapClientCredentialRoutes(); } // new client credentials method protected function mapClientCredentialRoutes() { Route::prefix('api') // I still want /api/ urls ->middleware('client_credentials') // new middleware I'll set up in a bit ->namespace($this->namespace) ->group(base_path('routes/client_credentials.php')); // referencing my new routes file } }
RouteServiceProvider.php

Now that our routes are setup, we need to get that middleware working. We’re going to add it into the same file where the rest of our middleware is defined:

/app/Http/Kernel.php

Here I created a new middleware group for client_credentials (“client_credentials” is the string we used in RouteServiceProvider.php for our new middleware). This file has been abbreviated to show only the updated info.

<?php class Kernel extends HttpKernel { protected $middlewareGroups = [ 'web' => [ \App\Http\Middleware\EncryptCookies::class, \Illuminate\Cookie\Middleware\AddQueuedCookiesToResponse::class, \Illuminate\Session\Middleware\StartSession::class, // \Illuminate\Session\Middleware\AuthenticateSession::class, \Illuminate\View\Middleware\ShareErrorsFromSession::class, \App\Http\Middleware\VerifyCsrfToken::class, \Illuminate\Routing\Middleware\SubstituteBindings::class, ], 'api' => [ 'throttle:60,1', 'bindings', ], // my new middleware group 'client_credentials' => [ \Laravel\Passport\Http\Middleware\CheckClientCredentials::class, 'throttle:60,1', 'bindings', ] ]; }
Kernel.php

Here you’ll notice we reference:
\Laravel\Passport\Http\Middleware\CheckClientCredentials::class,

That is the %$%$@ middleware to check the client credentials that is no where to be found in the documentation.

With all that in place, I thought, yeah, this isn’t going to work but I’ll try it anyway. I fire up postman, try to hit an endpoint…
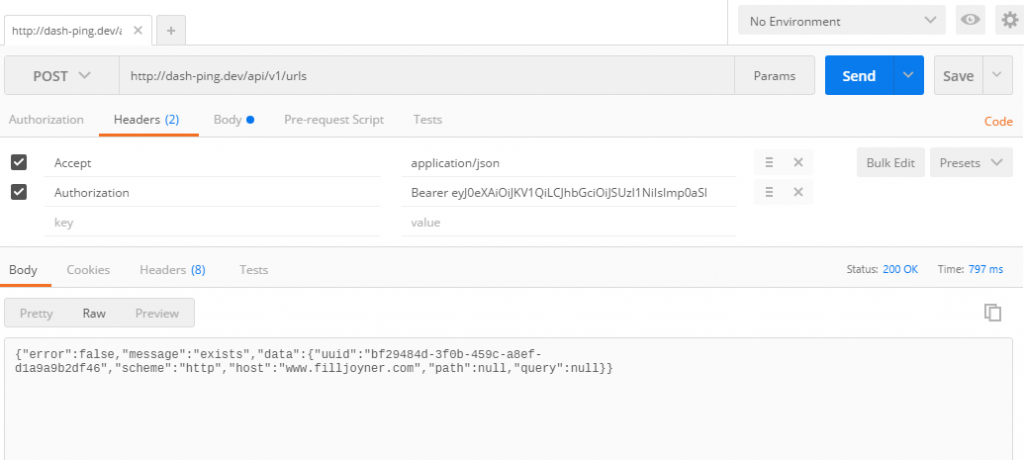
It worked! Yay! Hopefully if you’re banging your head against a keyboard right now trying to figure this out, like I was, this article will help.


I pulled ideas from this posts but the implementation was a bit awkward.